
Contents
Before you can assign Permissions to a User, you need to create Roles.
•Descriptions of what each Permission allows and the recommended User Level for each one are available in Permission Definitions.
When Synergy is installed there are no pre-defined Roles set, the User can create their own Roles and decide what Permissions to assign to each Role.
•Figure 160 below shows a typical set of Roles in the Role Name column.
•There is no limit to the amount of Roles that can be set.
Example Roles could include:
| This could be a high level Role, with all Permissions assigned. |
•Advanced User
This could be a trusted User, with access to Admin functions blocked but still able to edit sensor properties. Full data viewing and alarm acknowledging allowed.
•General User
This could be a lower level User, with access to Admin functions and sensor editing blocked. Full data viewing is allowed.
| This could be a view-only User with no editing or alarm acknowledging rights. Full data viewing is allowed. |
To add new Roles, either following installation of Synergy or at any other time:
1.Select Access Control from the Admin menu, located at the right hand side of the top menu bar. See Figure 159 below:
Figure 159

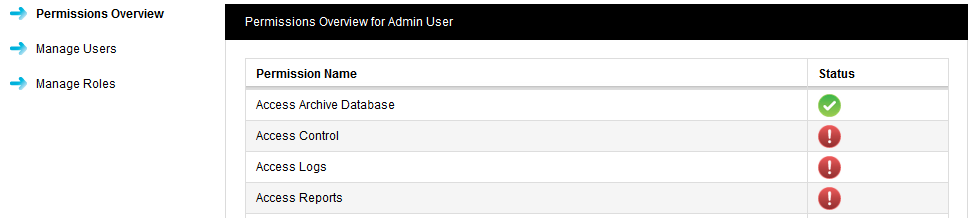
2.After selecting Access Control, the Permissions Overview for Admin User window is shown, displaying a list of all available (Admin User) permissions. See Figure 160 below:
Figure 160
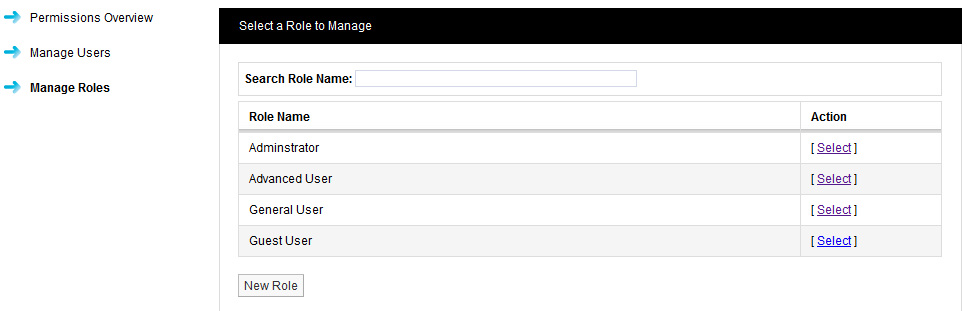
3.Select Manage Roles from the left-hand list to display the Select a Role to Manage window. See Figure 161 below:
Figure 161
4.Click on the New Role button at the bottom of the displayed Select a Role to Manage window to display the New Role window. See Figure 162 below:
Figure 162

5.In the Name field of the New Role window, enter a name for the new Role.
•We would recommend using Administrator for the highest level User.
•It is also suggested that all Permissions are set to Allow for the with the exception of Activate privileged Access which should be set to Deny.
6.Select Save.
•You have now created your new Role.
•Other Roles can be created as required by following the instructions above.
•When the Select a Role to Manage window is displayed you can also allocate or remove Permissions to or from the Role or delete the Role entirely (see Managing Roles below).
To allocate or remove Permissions to or from an existing Role or delete the Role entirely:
1.From the Select a Role to Manage window (see Adding New Roles above) displaying a list of all available Roles. See Figure 163 below:
Figure 163
Either:
Type the name of the Role to be managed into the Search a Role Name: box at the top of the Select a Role to Manage window.
Or:
Click [Select] in the Action column of the Select a Role to Manage window, next to the Role to be managed.
To display the Manage Role window for the new Role. See Figure 164 below (illustrates an Administrator Role):
Figure 164
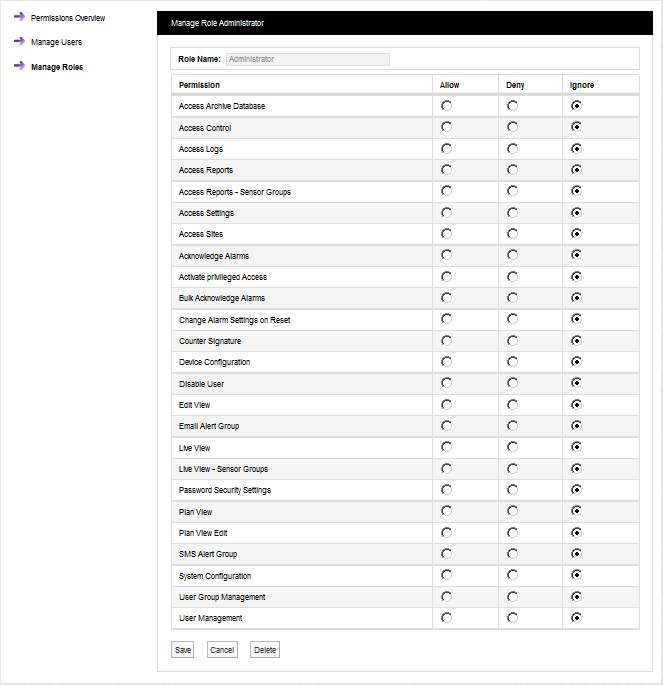
2.Allocate or remove Permissions to or from the Role by checking or unchecking the Allow, Deny or Ignore radio buttons.
3.Press the Save button to save the new Permissions allocation for the Role.
Press the Delete button.
| Note: | When Synergy is installed, a default Admin User is created. This default Admin User cannot be deleted and is preset with the Username: “Admin User” and the Password: “Admin”. We recommend that these details are changed immediately after installation. |
•The default details can be changed in the Add Password section of Admin>User Management.
•The default Admin User is pre-assigned with all available Permissions.